Bermuda Elite HR Installation in Boca Raton and Fort Lauderdale
Bermuda Elite HR Installation Process
To achieve a professional looking installation with our Bermuda elite HR we recommend you hire one of our certified installers or follow these instructions on how to do it yourself.
Step 1: Site Preparation
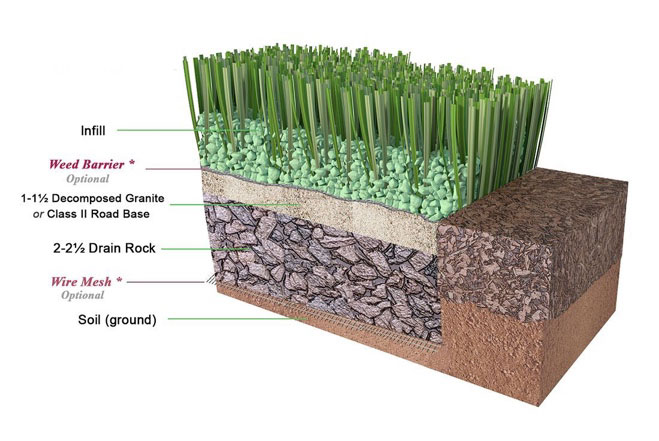
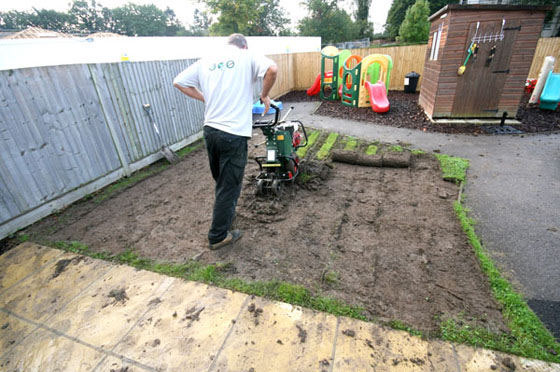
Mark out and measure the area you want to cover. Remove any grass, tree roots, mulch, rocks, and debris from installation area. Install any curbing, edging, or other border materials. If needed, re-measure to confirm accurate measurements.
Remove Existing Sod Spread a 4” sub-base of a ¼ minus crushed stone (also called road base, chat, or decomposed granite).
Generally, one ton per 100 square foot is advisable. Grade the base as smoothly as possible and compact to about 95%. It is best to use a plate compactor; these items can be rented from your local hardware stores.
Lightly hose down the installation area after you install your 4” sub-base then compact with the plate compactor.
Step 2: Weed Barrier
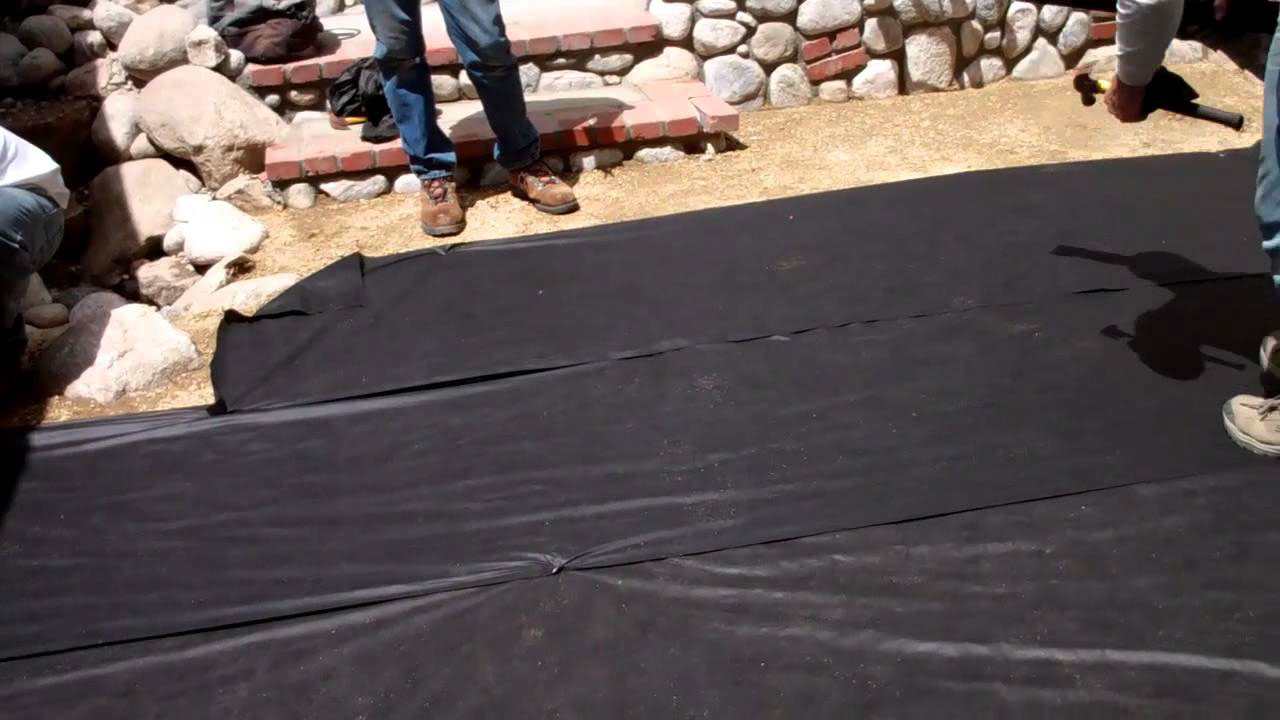
Regular landscape weed barrier will help prevent vegetation from growing over time, make sure that the fabric is well secured all around before applying the turf.
Step 3: Installation of Turf
Note: All artificial grass has a grain direction. Make note of the grain direction.
Roll out the turf on top of the weed barrier. Position the turf and pull out any wrinkles. Stake the turf down one side before you stretch or pull the turf. This will keep the turf from shifting.
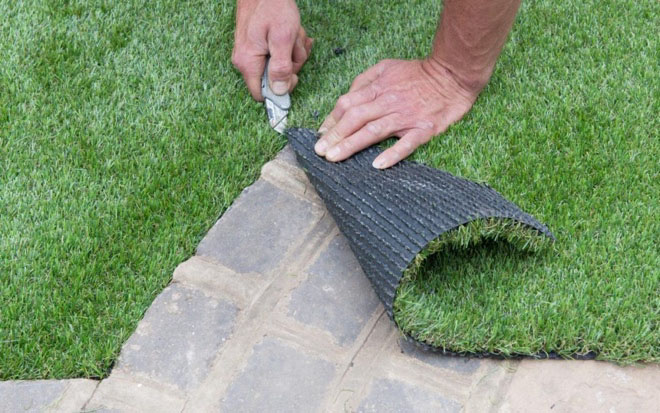
Once you position the turf, trim the edge of each piece of turf, if needed, (with a razor knife or carpet cutter, found at any hardware store) so that they are very straight.
Once you have cut the edges of each roll straight, lay them in the desired position. Use 6” nails to secure the perimeter of the turf spaced the nails every 4” inches, or as needed.
Lay Out Turf
If you are seaming more than one piece of our Bermuda elite HR together decide which direction you are going to lay the turf and plan the layout and seam locations.
Seaming two pieces of turf that are in different directions will be noticeable.
Once you position the turf trim the edge of each piece of turf with a razor knife or carpet cutter, lay them adjacent to each other on the base in the desired position. Make sure that the “tuft lines” or stitch lines of each roll match with each other. If you make good straight cuts and match the tuft lines, your seams will be virtually invisible.
Once you have the turf cut and the tuft lines matched, you can seam the two pieces of turf together by using cold seaming tape (available from your turf supplier or purchased at any hardware store). Place both ends of the turf edges together, line up the “tuft lines” and then fold back the edges of the turf sections so that you can lay the cold seaming tape down underneath the turf sections. Peel the backing off the cold seaming tape to reveal the sticky side (up) and then simply fold the two sections of turf down together over the sticky seaming tape to form one seamless piece of turf.
For additional seam assurance, you should also nail the seamed sections with 60d-6” nails along each side of the seam alternating about every 3 inches in addition to nailing the perimeter.
Step 4: Infill
In addition to nailing the turf, you will need to place an “infill” material on top of the turf. (20/30 silica sand) our Bermuda elite HR requires a minimum of 1 lbs of infill per sf. It helps protect the turf from the elements and to help keep it flat and level.
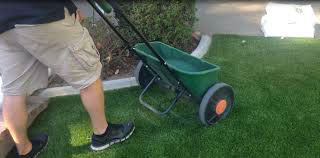
The easiest way to spread infill is with a drop spreader (the type commonly used to spread grass seed or fertilizer) Place the infill material in the hopper of the spreader and set at about a five on the gauge (or medium open) on the hopper. This opening size will allow for a fair amount of infill to get into the fibers of the turf.
Walk slowly behind the spreader allowing the infill to spread evenly on the turf. Typically, you will spread about ½ lb of infill per pass with the spreader. In between spreading the layers of infill, brush the turf fibers upright with a stiff bristled broom.
For a larger job you may want to use a power broom. Do Not “dump” the infill in large quantities on the turf, as it will be very difficult to get an even infill distribution, and you may bury the blades. Repeat the infill process until the infill is evenly spread.
Step 5: Brushing
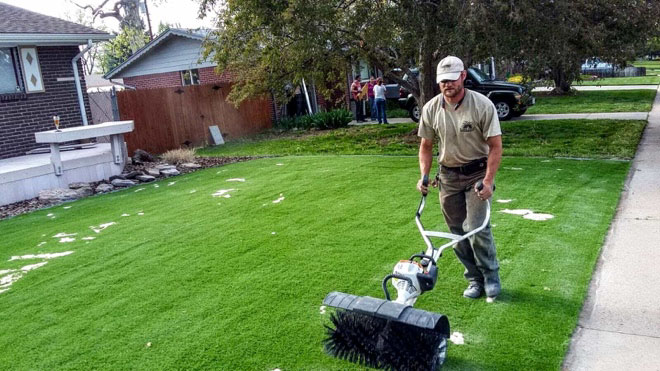
Use a power broom to brush the turf and even out the infill, before adding infill remember to brush turf in a upright direction to make the infill go down easily.
Step 6: Maintenance
While the Bermuda elite HR is a low maintenance product following these simple suggested routines will ensure that you will protect and enjoy your new artificial grass for years to come.
Daily pick up droppings with a “pooper scooper” Once every month you should blow off your turf with a leaf blower to get the leaves and dust off the turf fibers. This will take only a few minutes but will keep your turf looking beautiful.
Once every quarter, you should aggressively brush your turf (against) the grain to get the turf to stand up and to clean the dust and debris off the turf fibers. You can brush the turf with a very stiff broom (garage type), carpet rake, or a power broom. Once every year you should check the infill and seams. If needed add additional infill.
Please contact us with any questions regarding your installation and we will be happy to assist you.

